
Fixed Error: AnyDesk Cannot be Accessed from the Intranet
Anydesk has become an indispensable software in many jobs. It breaks the geographical restrictions and allows us to connect seamlessly anytime and anywhere. However, sometimes we may encounter such a problem: when the computer is located in the company’s intranet, although it can freely access the Internet, Anydesk cannot be accessed from the Intranet normally. This article will introduce you to a simple and easy solution.
How to Fix AnyDesk Cannot be Accessed from the Intranet Issue
Step 1. Ensure Prerequisites
Before trying to solve the problem of Anydesk not being able to be used on the company’s intranet, we need to ensure that the following prerequisites are met:
First, your computer must be able to access the Internet normally; second, your company’s intranet has no special security policies or firewall settings that prevent Anydesk from running; finally, you have tried restarting the Anydesk software and the computer, but the problem still exists. Only after these conditions are met can we further explore solutions.
1. Your computer can successfully connect to the Internet through dial-up or other tools.
2. When trying to use Anydesk, the software eventually displays a prompt message “Connection error, please check your network connection.”
If you get a “Connection Error, please check your network connection” message when trying to use Anydesk, you can try the following to resolve the issue:
- Make sure your computer is successfully connected to the Internet and the network status is stable.
- Check your firewall settings to ensure that Anydesk software is not blocking or restricting network connections.
- Try restarting your router or adjusting your network settings to improve your connection.
- Check whether the Anydesk software version is the latest. If not, please upgrade to the latest version.
- If the problem persists, you can contact Anydesk’s technical support team for further assistance and solutions.
Step 2. Proxy Server Settings
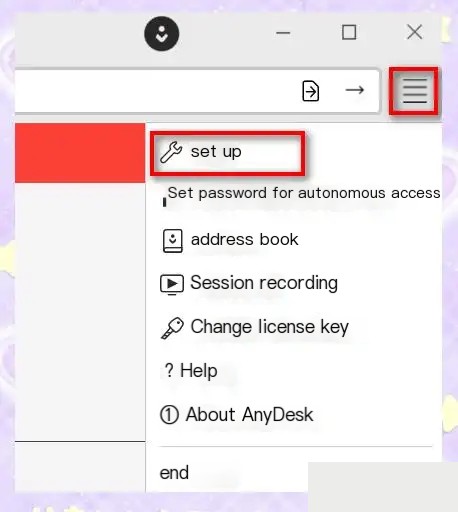
Follow the steps below to set up the proxy server: First, find and click the settings option as shown.
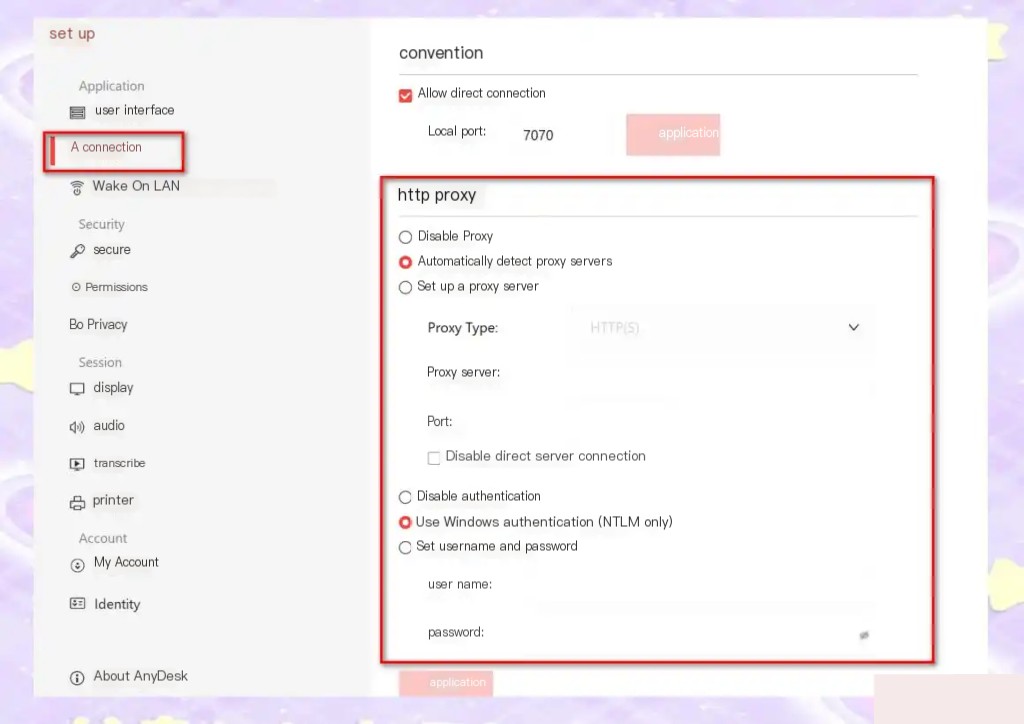
After clicking the connection option on the left, you will see 3 different connection setting types and 3 authentication types available on the right. Usually, to enable AnyDesk to connect to the internal network, we can try the following three combinations:
- Automatically detect proxy servers and set username and password.
- Automatically detect proxy servers and disable authentication.
- Manually configure the proxy server and set the username and password accordingly.
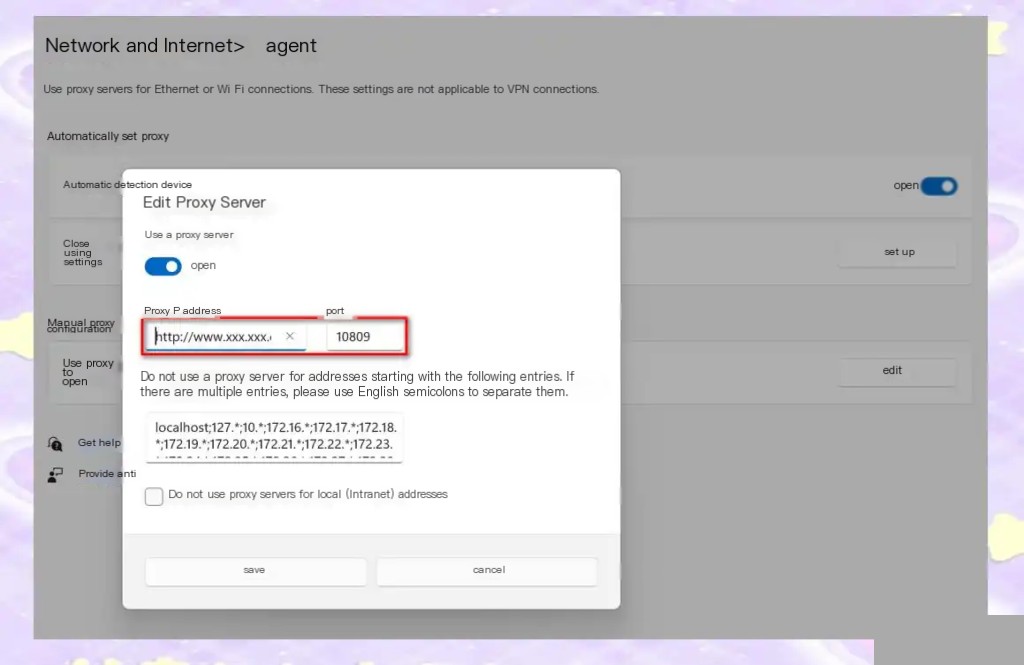
When you choose to manually set the proxy server, you need to find and fill in the corresponding information on your computer. The specific location may vary depending on the operating system.
When trying to connect to the internal network, we may encounter situations where we need to enter a username and password. These usernames and passwords are usually our account information and are used to verify our identity. After setting up the proxy server and filling in the username and password accordingly, it is recommended to close AnyDesk first, then reopen it and observe for a while to ensure that the connection has been successfully established.
In addition, Anydesk also supports multiple authentication types. Interested users can learn more and try various settings.
Conclusion
While AnyDesk is a powerful remote access tool, connection issues on a company intranet can hinder its functionality. By ensuring internet access, checking firewall settings, updating the software, and properly configuring proxy server settings, users can overcome the common “Connection Error” problem. Following these steps allows for a more stable and secure remote connection, even within a restricted network environment. If problems persist, reaching out to AnyDesk support is a recommended next step.